Data export
Enterprises often have thousands of code repos across many departments, divisions or business units. FinOps teams are usually centralized and need visibility across the enterprise so they can better prioritize their efforts.
Infracost data exports provide this visibility. FinOps teams can, for example, see that departmentA is doing well when it comes to latest generation instance types being used, but need help improving their tagging coverage; or that departmentB has few data retention policies so specific training might be needed.
Infracost Cloud lets you export FinOps and tagging issues across all of your repos, as well as cost estimates of all your pull requests. This data, available in CSV format, can be imported into your existing cloud cost dashboards and tools such as PowerBI or Tableau.
Usage
This guide describes how you can set up the Infracost Cloud data export to deliver CSV files to your AWS S3 or Azure Blob Storage.
Data exports can be setup at either the Infracost organization level, or the enterprise level (an enterprise contains multiple organizations).
Organization data export
Once configured, CSV files will be updated daily with the latest information, replacing any earlier versions of the file:
infracost_branch_policy_summary_v1_YYYYMMDD.csvcontaining the same information as theinfracost_enterprise_branch_policy_summary_v1_YYYYMMDD.csvdescribed below, but just for the organization (as opposed to all organizations in the enterprise).infracost_merged_prs_summary_YYYYMM.csvcontaining the same information as theinfracost_enterprise_merged_prs_summary_YYYYMM.csvdescribed below, but just for the organization (as opposed to all organizations in the enterprise).infracost_merged_closed_prs_YYYYMM.csvcontaining cost information on pull requests that were merged or closed during the current month and year. This data can be used to see the portion of cloud costs caused by engineering changes, versus organic changes from things like data transfer. Information about guardrails are also included in this file, so you can see who is approving guardrails and who is merging without approvals.infracost_open_prs.csvcontaining information on pull requests that are currently open. This data can be used to see potential increases that'll impact your costs in the future, so you are not surprised and can plan accordingly.infracost_open_issues_YYYYMMDD.csvcontaining a row for every currently-open FinOps or tagging policy issue on the base branches (e.g. main or master) of all repos in the organization. Each file is a complete snapshot at the time it was generated. Use this data to drive remediation workflows in BI tools, ticketing systems, or custom dashboards. The file has the following columns:repo_url,repo_name,branch_name,project,file,line— where the issue lives in source control.resource_type,resource_address— the Terraform resource the issue applies to.policy_type,policy_category,policy_name,campaign_name— which policy flagged the issue.pr_comment_enabled,pr_requires_fix— how the policy is configured to behave in pull requests.issues— human-readable description of each issue on the resource.yearly_potential_savings,before_costs,after_costs— the cost impact if the issue is fixed (yearly savings, plus the JSON cost breakdown before and after).issue_status(alwaysopenin this file),status_reason(e.g.resource added,resource modified,discovered).commit_author,commit_url,infracost_run_url,run_timestamp— the commit and Infracost run that opened the issue.resource_tags— the resource's tags at the time the issue was opened.- One additional column per business property configured in the organization.
Enterprise data export
The enterprise data export consists of daily CSV files that contain a summary of all tagging and FinOps policy issues across all code repos in all organizations that are part of your enterprise. This data export also includes the number of issues that were prevented or fixed and the total amount of cost prevention or reduction from your policies.
-
infracost_enterprise_branch_policy_summary_v1_YYYYMMDD.csv: This file contains granular information on current FinOps and tagging issues from the base branches, e.g. main or master, of all repos across all Infracost orgs.This contains a row for each repo and each policy. Each file is a complete snapshot of the time it was generated at. This file will show 0 in the
issuescolumn if a repo has no issues. This file will show 0 in theapplicable_resourcescolumn if a repo has no applicable resources, e.g. no Terraform code yet. Repos archived and deleted in GitHub/GitLab are not included in this file so the numbers shown will match the Infracost Cloud dashboard. Repo's without a valid default branch run are included but will show 0 for all issues. If a repo is renamed, the next day's exported file will reflect the newrepo_name. -
infracost_enterprise_merged_prs_summary_YYYYMM.csv: This file shows the cost and governance impact for all pull requests merged in the month. This data is a breakdown of the numbers that can be seen in the Governance Impact and Cost Impact infographic in the Infracost Cloud dashboard.The cost data provided in this report includes
yearly_cost_reduction(costs reduced due to infrastructure changes, e.g. an engineer reduced the instance size),yearly_cost_prevention_pr_comments(costs prevented due to changes made by engineers after seeing cost estimates and FinOps policies in pull requests), andyearly_cost_prevention_guardrails(costs prevented due to changes made by engineers following guardrails being triggered. The total cost prevention for a repo sumyearly_cost_prevention_pr_commentsandyearly_cost_prevention_guardrails. To get the monthly figures, divide these numbers by 12.The issue data provided in this report includes
issues_prevented(number of issues prevented before pull requests were merged),new_issues_added(number of new issues added by merged pull requests), andpre_existing_issues_fixed(number of pre-existing issues in repos that were fixed by pull requests).Every day, the file for the current month will be updated with the latest information for the month-to-date, replacing any earlier versions of the file. So for example, on the first day of April 2024, infracost_merged_prs_summary_202404.csv will be created, and on the 2nd of April, the same file will be overwritten with the latest information. On the 1st of May, infracost_merged_prs_summary_202405.csv will be created.
Only repos that have merged pull requests appear in this file. If a repo has no impact data for the current month, it will not be included in this file. If a repo is archived or deleted in GitHub/GitLab, it will still be included in this file as long as it has merged pull requests in the current month. If a repo is renamed, the next day's exported file will reflect the new
repo_name. -
infracost_enterprise_licenses_summary_YYYYMM.csv: This file shows the total number of licenses used across all Infracost orgs in the enterprise for the current month. The pull request authors are de-duplicated across the Infracost orgs in the enterprise. This file will always have 1 row. -
infracost_enterprise_open_issues_YYYYMMDD.csv: This file contains a row for every currently-open FinOps or tagging policy issue on the base branches of all repos across all Infracost orgs in the enterprise. Each file is a complete snapshot at the time it was generated. It has the same columns as the organization-levelinfracost_open_issues_YYYYMMDD.csvfile described above, with three extra columns at the start to identify the owning organization:infracost_org_id,infracost_org_name,infracost_org_url— the Infracost organization that the issue belongs to.- Followed by the
repo_url,repo_name,branch_name,project,file,line,resource_type,resource_address,policy_type,policy_category,policy_name,campaign_name,pr_comment_enabled,pr_requires_fix,issues,yearly_potential_savings,before_costs,after_costs,issue_status,status_reason,commit_author,commit_url,infracost_run_url,run_timestamp, andresource_tagscolumns described above. - One additional column per unique business property defined across the enterprise's organizations. Business properties that collide with a built-in column name are prefixed with
custom:to disambiguate.
Export to AWS S3 bucket
This guide will walk you through the process of setting up an AWS Identity and Access Management (IAM) policy that allows Infracost to upload the CSV reports to your AWS S3 bucket.
Prerequisites
- An active AWS account
- A pre-existing S3 bucket where the Infracost will upload the CSV reports
- AWS Management Console access
- Your Infracost Org ID. This can be found in Infracost Cloud > Org Settings > Details section.
Step 1: Create IAM Policy
-
Sign in to the AWS Management Console and open the IAM Console.
-
In the navigation pane, click on Policies and then click on Create policy.
-
Choose the JSON tab and replace the existing content with the following policy:
{"Version": "2012-10-17","Statement": [{"Effect": "Allow","Action": ["s3:PutObject","s3:PutObjectAcl","s3:ListBucket","s3:GetObject"],"Resource": ["arn:aws:s3:::YOUR-BUCKET_NAME","arn:aws:s3:::YOUR-BUCKET_NAME/*"]}]} -
Replace
YOUR-BUCKET_NAMEin theResourcefield with the name of your S3 bucket where Infracost will upload the CSV report. -
Click on Review policy.
-
On the Review policy page, name your policy infracost-data-export-s3, then click on Create policy.
Step 2: Create IAM Role
- In the IAM console, click on Roles in the navigation pane and then click on Create role.
- Select Another AWS account as the trusted entity type.
- Enter the Infracost AWS account ID
237144093413in the Account ID field. This ensures that only Infracost can assume the role. - Check the Require external ID checkbox and enter your Infracost Org Id. This can be found in Infracost Cloud > Org Settings > Details section.
- Click on Next: Permissions.
- In the search box, search for the infracost-data-export-s3 policy you created in Step 1, select it, and then click on Next: Tags.
- Optionally, you can add tags to the role. Click on Next: Review after adding tags or skip it.
- On the Review page, name the role infracost-data-export, then click on Create role. You will be returned to the list of roles.
- Search for the infracost-data-export role you just created and click on its name.
- On the role details page, copy the Role ARN (Amazon Resource Name) located at the top of the page. You will need to enter this ARN in Infracost Cloud.
Step 3: Configure Infracost Cloud
- Log in to Infracost Cloud and navigate to Org Settings > Data Exports.
- Click on the AWS S3 Bucket section
- Enter the AWS S3 Bucket Name and Region (and optionally Prefix) indicating where the CSV files should be created.
- Fill in the AWS Role ARN field with the ARN for the Role you created in step 2.
- Click the Test Connection button and make sure it reports success. This will create an empty infracost-export-test.txt in your S3 bucket.
- Select the reports you'd like to include in the export.
- Use the Save button to complete the setup.
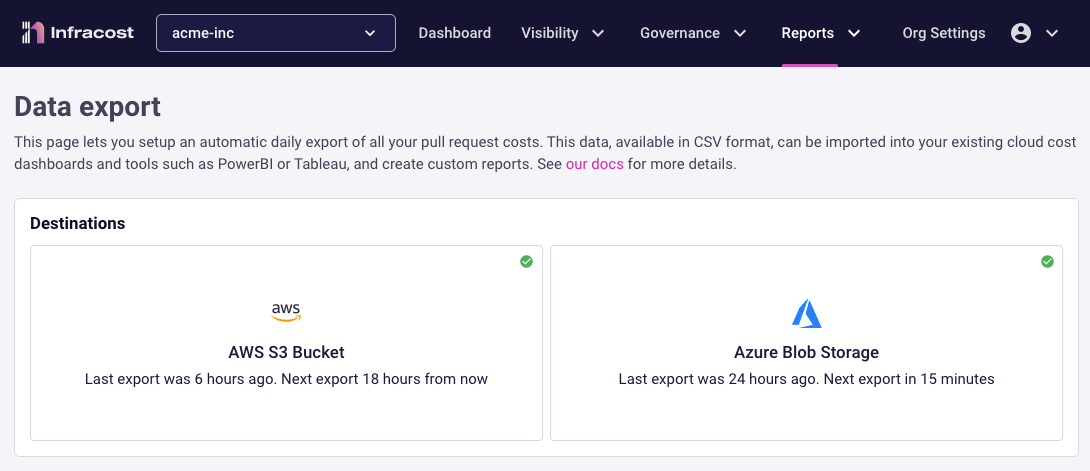
Your first report should be created in a few minutes and will continue to be updated approximately daily. You can return to the Data Export page to check on the status of your reports.
Export to Azure Blob Storage
This guide will walk you through the process of setting up data export from Infracost Cloud to Azure Blob Storage using a Service Principal. This allows Infracost to store the CSV files containing cost estimate data for your pull requests in your Azure Blob Storage.
Prerequisites
- An active Azure account
- An existing Azure Storage Account and a Blob Container
- Access to the Azure Portal
- Azure CLI installed locally, or access to Cloud Shell in the Azure Portal.
Step 1: Create Service Principal
-
Construct a scope that provides access limited to your Blob Container. This will be attached to the Service Principle and should look like:
/subscriptions/<Your-Subscription-ID>/resourceGroups/<Your-Resource-Group-Name>/providers/Microsoft.Storage/storageAccounts/<Your-Resource-Group-Name>/blobServices/default/containers/<Your-Container-Name>/blobServices/default/containers/<Your-Container-Name>An easy way to do this is to navigate to Storage Accounts page in Azure Portal and click on the name of your storage account. Then in the storage account Overview section, click on the JSON view link and copy the Resource ID to your clipboard. Complete the scope by appending
/blobServices/default/containers/<Your-Container-Name>to the end of this string. -
Open your command prompt or terminal and sign in to your Azure account using the Azure CLI by running the command:
az loginAlternatively, open a bash Cloud Shell in the Azure Portal. The Azure CLI is automatically installed and logged in when using this method.
-
Create a Service Principal for Infracost with the following
azcommand.az ad sp create-for-rbac \--name "Infracost-Export" \--role "Storage Blob Data Contributor" \--scope "<Scope-String-From-Step-1>" -
Take note of the
appId,password, andtenantvalues in the output, as these will be needed to configure Infracost Cloud data export.
Step 2: Configure Infracost Cloud
- Log in to Infracost Cloud and navigate to Org Settings > Data Exports.
- Click on the Azure Blob Storage section.
- Enter the Storage Account Name and Container Name (and optionally Prefix) indicating where the CSV files should be created.
- Fill in the Client ID, Client Secret, and Tenant ID using the
appId,password, andtenantvalues generated in step 1. - Click the Test Connection button and make sure it reports success. This will create an empty infracost-export-test.txt in your Blob Storage container.
- Select the reports you'd like to include in the export.
- Use the Save button to complete the setup.
Your first report should be created in a few minutes and will continue to be updated approximately daily. You can return to the Data Export page to check on the status of your reports.